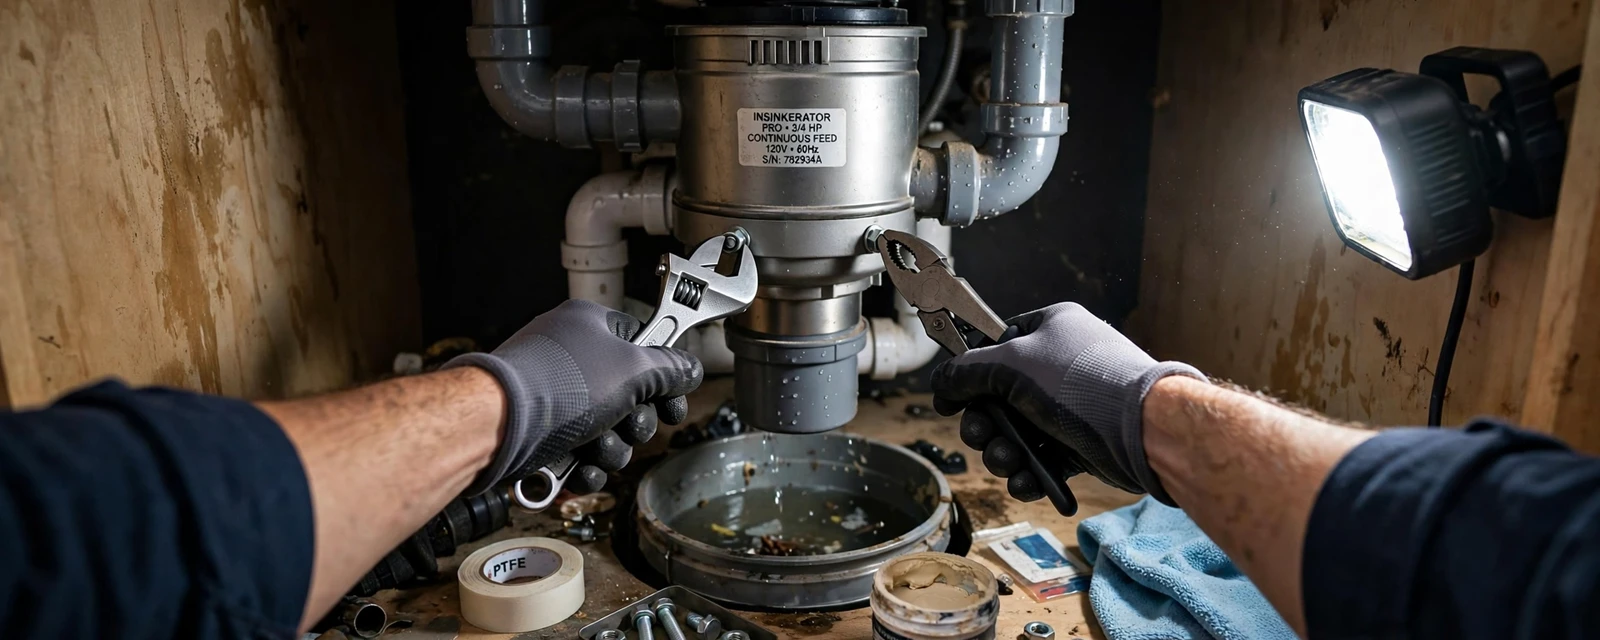
Installing a garbage disposal means turning off power, removing the old unit or sink flange, mounting the new unit under the sink drain, connecting the discharge to the trap, and wiring or plugging it in. The plumbing part is manageable for a careful DIYer. The electrical part needs care, and any new wiring, switch, or outlet work belongs to a licensed professional.
Never work on a disposal with the power on, and never put your hand in the grinder chamber.
A disposal bolts to the sink drain and grinds food scraps small enough to wash through your drain pipe. It has three connections to get right. The mounting ring holds it to the sink, the discharge outlet carries water to the trap, and the power cord or wiring feeds the motor.
Replacing an existing disposal with a similar model is the easiest case, because the sink, drain, and power are already in place. A first-time install, a new cabinet, or a move to a different sink takes more work, and some of it falls under plumbing installation and electrical rules. Below is what the job involves and where to hand it off.
Tools and parts before you start
Gather everything first. A half-finished install leaves your sink unusable.
- New disposal with its mounting kit
- Plumber's putty or the supplied gasket
- Screwdrivers, hex key, and slip-joint pliers
- A bucket and rags for trap water
- Non-contact voltage tester
- Discharge tube and a rubber gasket if not in the kit
- Dishwasher drain hose clamp, if you have a dishwasher
- Disposal power cord kit if the unit does not come with one
Electrical safety comes first
Turn off the circuit breaker for the disposal, not just the wall switch. Confirm with a non-contact tester that the wires are dead. A sink is a wet place, and a live wire plus water is a shock hazard.
If your sink has no outlet under the cabinet, if the wiring looks old or damaged, or if the disposal needs a new switch, call a licensed professional. Adding a circuit or running new wire is not a plumbing job and not a good place to learn.
Planning the drain before you buy
Measure the space under the sink. A larger unit hangs lower and can hit the trap or sit tight against the cabinet floor. Check where the discharge outlet points, since it must line up with the trap arm without sharp bends.
Look at the sink itself. A double bowl with one drain needs the right trap kit. If the second bowl has a separate drain, a continuous waste arm joins them. Take photos of your current setup and bring them to the store.
Disposal won't run or keeps jamming?
A licensed plumber can check the unit, the mounting, and the drain, and leave electrical work to the right professional. Call (407) 964-8940 any hour. The line is open 24/7.
Installing the disposal, step by step
These steps cover a standard replacement with an outlet or hardwire box already in place.
Cut power and clear the cabinet
Switch off the breaker, test the wires, and remove everything from under the sink. Place a bucket under the trap.
Remove the old unit
Disconnect the discharge pipe from the trap. Twist the old disposal off its mounting ring. Disconnect the wiring or unplug the cord. Lower the unit and set it aside.
Replace the sink flange
Remove the old flange and clean off old putty. Roll a rope of fresh plumber's putty and press it under the new flange lip. Seat the flange from above.
Attach the mounting assembly
From below, slide on the gasket, backup ring, and mounting ring. Tighten the screws evenly until the flange is firm and putty squeezes out. Wipe away the excess.
Prepare the dishwasher knockout
If a dishwasher drains into the disposal, knock out the plug inside the dishwasher inlet with a screwdriver and hammer. Fish out the plug. If you forget, the dishwasher will not drain.
Mount the unit and connect the drain
Lift the disposal onto the mounting ring and twist to lock. Attach the dishwasher hose, then connect the discharge tube to the trap. Make sure the trap arm slopes downward.
Connect power and test
Wire the unit or plug it in. Restore power. Run cold water and turn the disposal on. Check every joint for drips, including the flange from above.
How a disposal actually works
Inside the chamber is a spinning plate with two swiveling lugs. They do not cut like blades. They fling scraps against a shredder ring, and water flushes the small pieces down the drain. That is why a disposal needs a strong flow of cold water while it runs.
Cold water keeps grease solid so it breaks into bits and moves on. Hot water melts it, and it can coat the pipes further down. Run cold water for about 15 seconds after the grinding stops to clear the line.
Choosing a disposal
Match the unit to how you use your kitchen. These are the main choices.
| Type | What it does | Good fit |
|---|---|---|
| Continuous feed | Runs while the wall switch is on | Most households, simple to use |
| Batch feed | Runs only when a stopper is locked in place | Homes with small children |
| Smaller horsepower | Handles soft scraps | Light use, small households |
| Larger horsepower | Grinds tougher scraps with less jamming | Heavy cooking, larger families |
Even a strong disposal is not a trash can. Fibrous scraps, grease, and bones still cause clogs.
Permits and the Winter Springs building department
The city of Winter Springs building permit application says a separate permit must be secured for electrical work, plumbing, and signs. The building department is at 1126 East State Road 434.
The city form does not spell out every small job, so permit rules vary. Ask the Winter Springs building department whether your disposal install or any new wiring needs one before you start.
Source type: city building permit application
Common install mistakes
Forgetting the dishwasher knockout is the most common one. The dishwasher then fills with water and will not drain. Over-tightening the mounting screws on one side tilts the unit and leaks. Skipping the plumber's putty under the flange lets water seep into the cabinet.
Another mistake is reusing the old trap parts. Rubber washers harden over time and often fail on the first leak test. Replace them while the pipes are apart.
Check for leaks, jams, and noise
After the first run, fill the sink with a few inches of water and release it. Watch the mounting ring and the discharge joints. Dry each one with a paper towel and look for fresh moisture.
A humming disposal that does not turn is jammed. Switch off the power, then use a hex key in the bottom socket to free it. Never use your hand. If it trips the breaker again or smells hot, call for garbage disposal repair.
When to stop and call
Call if the wiring is damaged, the outlet is missing, or the box has no ground. Call if the cabinet floor is wet or soft, which suggests an old leak. Call if the trap does not line up with the new discharge and needs to be reworked.
Call if the sink is stone or a thin stainless basin, because a bad mounting can crack it. Call if the unit is much larger than the old one and the cabinet is too tight to fit it.
A plumber can swap the unit, rework the trap, and set the correct slope. They will also test for leaks. Ask for a clear price before work starts.
What should never go down the disposal
Grease and oil harden in the trap and line. Coffee grounds pack into a dense paste. Potato peels and pasta swell with water and form a thick mass. Celery, corn husks, and other stringy scraps wrap around the shredder.
Bones, fruit pits, and glass can jam or dent the grinder. Scrape plates into the trash first, then use the disposal for soft leftovers. That one habit prevents most service calls.
Questions readers ask
Replacing one with a similar unit is a common DIY job if power and plumbing are already in place. New wiring, a new circuit, or a missing outlet should be done by a licensed professional.
The knockout plug in the disposal's dishwasher inlet is probably still in place. Turn off power, remove the hose, and punch the plug out with a screwdriver, then retrieve it from inside.
The city says a separate permit must be secured for electrical and plumbing work, and permit rules vary, so ask the Winter Springs building department at 1126 East State Road 434 before you start.
It depends on use, water quality, and what goes down it. Signs of aging include rust at the housing, leaks from the bottom seam, and frequent jams. A plumber can tell you if repair is worth it.
Yes. Licensed plumbers serve Casselberry and Lake Mary. Call (407) 964-8940 and ask about same-day appointments when available.