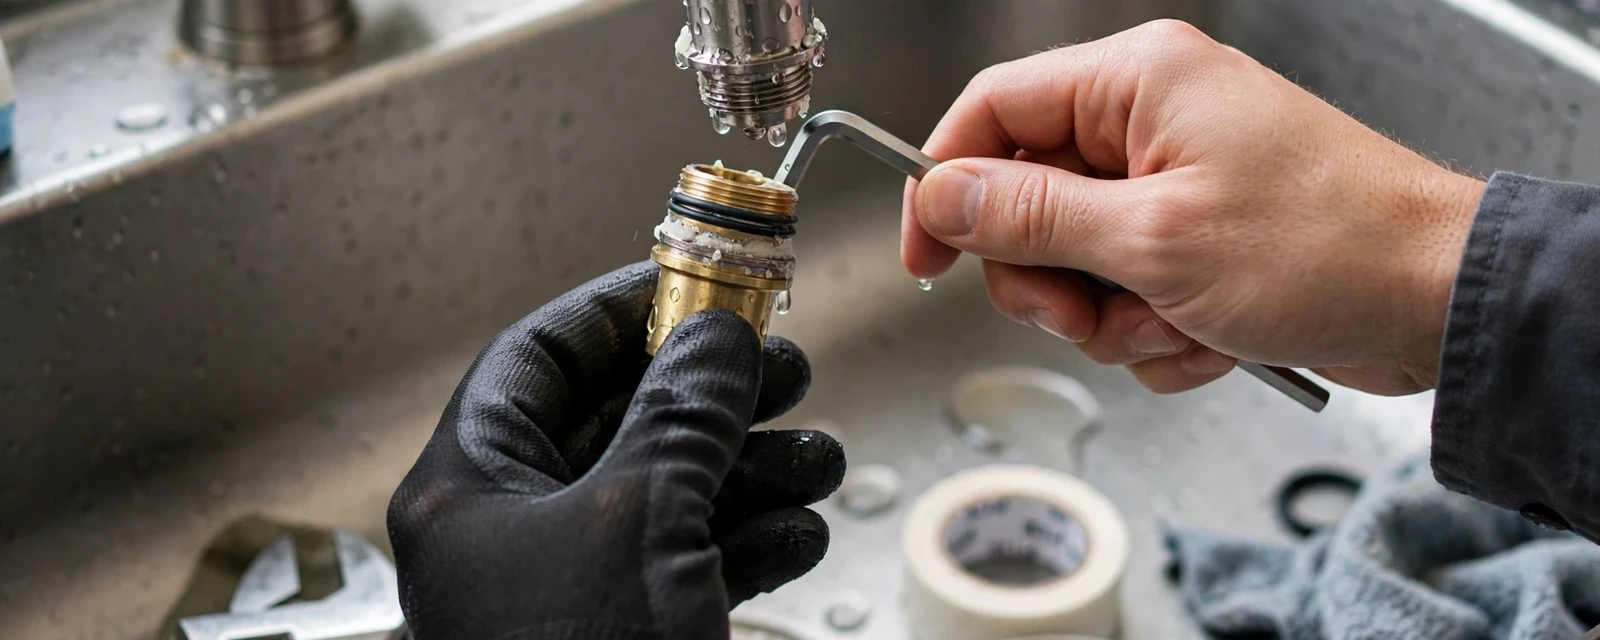
A single-handle shower faucet that drips almost always has a worn or scaled cartridge inside the valve. The fix is to shut off the water, remove the handle and retaining clip, pull the old cartridge straight out, and push in an identical new one. Most people finish in under an hour with basic hand tools.
Stop and call a plumber if the water will not shut off, the valve body is cracked or badly corroded, or you see moisture on the wall behind the shower.
A drip from the shower head or tub spout means the valve is not closing all the way. In a single-handle faucet, one cartridge controls both hot and cold. Inside it, rubber seals press against ports to block the flow. When those seals harden, tear, or get coated with mineral scale, a thin stream sneaks past.
Before you buy parts, work out where the water is leaking. A drip from the spout or shower head points to the cartridge. Water around the handle points to a worn O-ring or a loose retaining nut. A stain on a wall or ceiling near the shower points to a leak inside the wall, and that is a job for a faucet repair visit, not a weekend project.
Read the leak before you buy a cartridge
The place the water shows up tells you most of what you need to know. Use this table to decide whether the job is yours or a plumber's.
| What you see | Most likely cause | Your next move |
|---|---|---|
| Drip from the shower head after the water is off | Worn cartridge seals or scale on the cartridge ports | Replace the cartridge |
| Drip from the tub spout while the shower runs | Diverter problem, not the cartridge | Check the diverter or spout before touching the valve |
| Water seeping around the handle or trim plate | Failed O-ring or loose retaining nut | Replace the O-ring and snug the nut |
| Hot and cold mix when the handle is off | Cartridge ports worn or valve body scarred | Replace the cartridge, call a plumber if it persists |
| Stain, bubbling paint, or soft drywall near the shower | Leak inside the wall or at a pipe joint | Stop and call a plumber |
A diverter is the small lift knob or valve that sends water to the shower head instead of the spout.
What to gather first
Cartridges are not universal. Brands differ in length, spline count, and the way the stem keys into the valve body. Having the right part in your hand saves a second trip to the store.
- Replacement cartridge that matches the brand stamped on the trim or the old part
- A flat screwdriver and a small hex key set
- Needle-nose pliers for the retaining clip
- A cartridge puller if the old one is stuck
- Plumber's grease rated for potable water
- A towel or rag to plug the tub drain
- A flashlight and a phone to photograph each step
Replacing the cartridge, one step at a time
These steps fit most common single-handle shower valves. Your model may differ slightly, so photograph every layer as it comes apart.
Shut off the water
Close the stop valves for the shower if you have them. If not, shut the home's main valve, then open a faucet at the lowest point to drain the line. Plug the tub drain so no small part falls in.
Remove the handle and trim
Pop the cap off the handle, back out the screw behind it, and lift the handle off. Unscrew the trim plate and set it aside with its screws.
Take off the stop tube or retaining nut
Some valves have a plastic stop tube over the cartridge. Pull it off. Then remove the retaining clip or nut with pliers. Note which way the stem faces before you go on.
Pull the old cartridge
Grip the stem with pliers and pull straight out, wiggling gently. A stuck cartridge needs a puller. Do not pry against the valve body, because a scored body will leak no matter what you install.
Clean the valve body
Wipe the inside with a rag. Scrape loose scale from the ports with a plastic pick. Check for pitting or cracks, which mean the valve body itself is failing.
Install the new cartridge and test
Coat the new O-rings lightly with plumber's grease, push the cartridge in with the stem in the same orientation, and replace the clip, stop tube, and trim. Turn the water on slowly, check the trim for drips, then run hot and cold.
Shower still dripping?
A licensed plumber can pull the valve, check the seat, and tell you if the wall needs work. Call (407) 964-8940 any hour. The line is open 24/7.
Winter Springs water and your shower valve
The city of Winter Springs lists its water hardness at an average of 150 mg/L, which it reports as 8 grains. On the USGS hardness scale, 121 to 180 mg/L counts as hard. Hard water leaves scale on shower heads and aerators.
In a shower valve, that same scale builds on the cartridge ports and rubs against the seals every time you turn the handle. If your old cartridge looks crusted with white or tan deposits, expect the new one to need attention sooner than the package suggests.
Source type: city utility page, winterspringsfl.org
If the leak is at the handle, not the spout
Water that runs down the wall from behind the handle usually comes from a dried O-ring on the cartridge body or a retaining nut that has backed off. This is the easiest shower leak to fix. Once the handle is off, snug the nut a quarter turn and check again.
If the nut is tight and the leak remains, replace the O-rings while the cartridge is out. Match their size exactly, since a ring that is slightly too thin will seep. Use grease on the new rings so they slide into the body without rolling or tearing.
Leave the tile and caulk alone until you know the source. Many people reseal a trim plate and trap the water behind it, which hides the leak while the wall stays wet.
When to stop and call a plumber
Some shower leaks are not worth fighting. If you can not get the water fully off, do not open the valve. A broken stop valve or main valve can flood the wall cavity the moment the cartridge comes out.
Call if the valve body has green corrosion, a visible crack, or loose mounting in the wall. Call if the trim sits behind tile and you would need to cut into it. Call if the valve is soldered copper that needs a torch, since heat near wall framing is a fire risk.
Also call if you find damp drywall, a musty smell, or a stain on the ceiling below. Those point to a leak behind the finished wall. A plumber can pressure test the supply lines and find the exact joint instead of guessing.
Check your work for a full day
A shower valve can look fine at the trim and still weep inside the wall. After the repair, run the shower for a few minutes on hot, then on cold, then shut it off and watch the spout for a minute. Dry the trim with a towel and feel for fresh water.
Check the ceiling or adjoining wall the next morning. If the paint is dry and the spout stays quiet, you are done. If a drip comes back within days, the seat inside the valve body may be scarred, and replacing the whole valve is the lasting fix.
Swapping the whole valve instead
Sometimes the cartridge is not the problem. Valves from older homes can have worn seats or a body that no longer takes a modern cartridge. Replacing the whole valve means opening the wall from the back or cutting tile, and cutting or soldering the supply lines.
That is work for a licensed plumber, and it often goes along with other plumbing installation work like a new trim kit or a pressure-balancing valve. Ask for a clear price before work starts so you know what the wall repair adds.
Questions readers ask
Look for a brand name on the handle, trim plate, or valve body. Remove the old cartridge and take it to the store, or photograph it with a ruler beside it. Length, stem shape, and the number of splines must all match.
Heat expands rubber seals and mineral deposits. A seal that holds cold water can pass hot water through a small gap. This usually means the hot port is scaled or the seal on the hot side has hardened, and a new cartridge corrects it.
Scale on the ports and seals does shorten cartridge life, and the city lists local hardness at 150 mg/L. Cleaning the valve body at each replacement helps. A water softener addresses the cause, though results vary by home.
No. With the water on, the pressure pushes the cartridge out and floods the bathroom. Shut off the stop valves or the main valve first, and open a lower faucet to drain the line.
Yes. Licensed plumbers cover Oviedo and Casselberry from Winter Springs. Call (407) 964-8940 to ask about same-day appointments when available.